
This post is for families looking for a high quality program or educators setting up and/or maintaining a program. By no means, is this the end of the list of items that you should be able to see, but it's definitely a start. Also, this list is focusing on the physical indoor environment. There's lots more to be said about the emotional/relationships that should be occurring and the importance of the outdoor environment, as well, and perhaps those items can be covered in later posts. These items are also numbered, but not in order of importance, but simply to keep up with the number of items we are listing. So, let's get started...
1. Pleasing to all of the senses: The sights should be appealing, the sounds should be pleasant, the smell should be to your liking, and there should be hands-on experiences to meet the needs of the kinesthetic (tactile) learner. You'll note I didn't mention taste. Though that is equally important, if you're visiting a program it very well may be something you don't necessarily experience.
2. Open and inviting: It should be open enough for children and adults to maneuver around freely, including individuals with adaptive equipment, but not open enough to encourage running in class.
3. Clean and organized by areas or interest centers: In our class we have these areas: dramatic play, music, blocks, manipulatives, math/science, art, library/listening center/reading loft, writing. We also rotate some centers throughout the year including: a train table, a Lego table, a dollhouse, a zoo, a light table, and more. The shelves should be open and inviting and not too cluttered, so that children feel at ease choosing items to use and know where to return them.
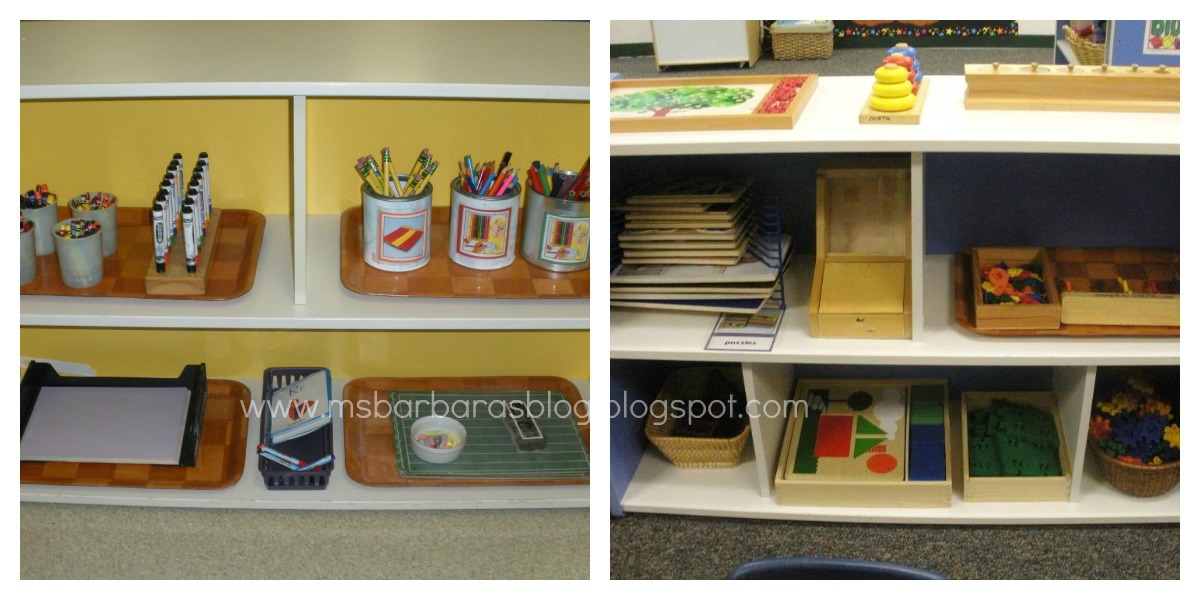
4. At the Children’s level: We must ask ourselves, "Who is this classroom set up for? Is everything on a level that appeals to the children in my program?" One suggestion I have heard, that is timeless, is to get down yourself on the level of the children in the program. This may mean walking around on your knees or even on your hands and knees. Then ask yourself, "Is everything meant for the children's benefit on a level that they can access it themselves and see/experience it fully?" If the answer is "no", you may want to make some changes. An example of this is the low shelving, but another very important aspect are the wall displays. If you have a calendar, ABC wall, helper chart, and the like, can the children easily reach to utilize it? If you are displaying their artwork, documentation of their work/experiences, etc., can they view it easily? I want all usable activities (calender, ABC wall, helper chart) easily within their reach and generally display things no higher than 4 feet up a wall.

5. Natural lighting/Plants: Children and nature go hand in hand, so for the time they spend indoors, it’s beneficial to bring the outdoors inside. Natural lighting is both aesthetically pleasing and promotes a sense of well being in all of us. Our program has fluorescent lighting and we spend much of the time with the lights turned off or at least dimmed to a degree. We open the blinds (and doors, when we can) and let that natural light permeate the environment. Hanging prisms and/or beautiful wind chimes and placing beautifully colored items in the window can accentuate and take advantage of the glorious sunshine. Plants are another way to bring nature into the classroom and provide opportunities for children to be helpers by taking care of them. Be sure to check to verify that the plants you have chosen are not toxic to children. A site such as this lists common toxic plants http://aggie-horticulture.tamu.edu/lawn_garden/poison/poison.html It’s always a good idea to find a site or book that contains plants common to your area.

6. Natural materials: I love incorporating natural materials and fibers into the preschool environment. My classroom has a variety of colored shelves, tables, and chairs, none of which I can change at this time. However, I am making strides to change the things I can. I use a variety of baskets and wooden materials throughout the classroom. There’s just something about these natural items that are warm and inviting to us all.

7. Real materials: Just like the natural materials listed above, these give the children a sense of pride and responsibility as they are being trusted with them. Using real dishes and pots and pans may increase the chances of something breaking, but it gives the children real life experiences that they don’t get with plastic items. Incorporating real materials such as: bird nests, sunflower heads, seashells, fossils, wooden tree blocks, driftwood, and the like, help them have genuine natural experiences.


8. Cozy areas: Classrooms have areas for large groups and small groups, but it is essential that there are places for only one or two children to gather. Sometimes children are overwhelmed with stimulation from many others and need a place to go that’s cozy, calm, and reflective. We have a bench with stuffed animals on it, a soft sofa in the library, and our reading loft for this purpose.
9. Inviting provocations: We want children to feel free to pull items off the shelf that they wish to engage with, but often setting up a provocation (invitation) with a variety of materials is effective to have children choose to participate that maybe wouldn’t have chosen to otherwise. Items should be aesthetically pleasing and should pique curiosity and wonder about the items and often inspire and invite children to explore them.


10. Ratios: Much can be said about ratios. However, most programs based on their licensing and such, have determined ratios based on the size of the classroom and the number of children allowed to be enrolled. The best scenario is always one adult to the lowest number of children possible. Our program is licensed for 20 students and our license ratio for adults to children in 1:8. It’s also good to look at the schedule for indicators of individualized and/or small group attention. In our program we have ample exploration time where the children choose their own activities, two large group times, and small group times.
11. Diversity: You should be able to see the representation of the children attending throughout the classroom in books, dolls, posters, in cooking (food and tools used) and materials along with artifacts and things viewed in their everyday lives. This diversity includes: race, ethnicity, abilities, ages, and lifestyles.

There are many more things to learn and see when you take the time to really look at a program including the relationships, philosophy, outdoor environment, etc., but this should give you a good foundation of things you should see in a high quality indoor classroom environment.


.jpg)
.JPG)
.JPG)
.JPG)
.JPG)
.JPG)
.JPG)


.JPG)
.JPG)
.JPG)
.jpg)
